Blog
September 9, 2020

As application development has shifted more towards cloud-based architecture there has been an increase in confusion and complexity in configuring and running applications. We designed this step by step guide to help developers set up an AWS Java application on EC2
Back to topSteps for Setting Up an AWS Java Application on EC2
For this AWS Java tutorial, we'll be running the Spring PetClinic Application on an AWS EC2 instance. To get started, we'll first create an AWS account.
Back to top1. Creating an Account
To create an AWS account, follow these steps:
- First go to https://aws.amazon.com/
- Click on Create an AWS Account.
- For testing purposes create a free account which provides you with 1 year without payments
2. Setting up an EC2 instance and Launching
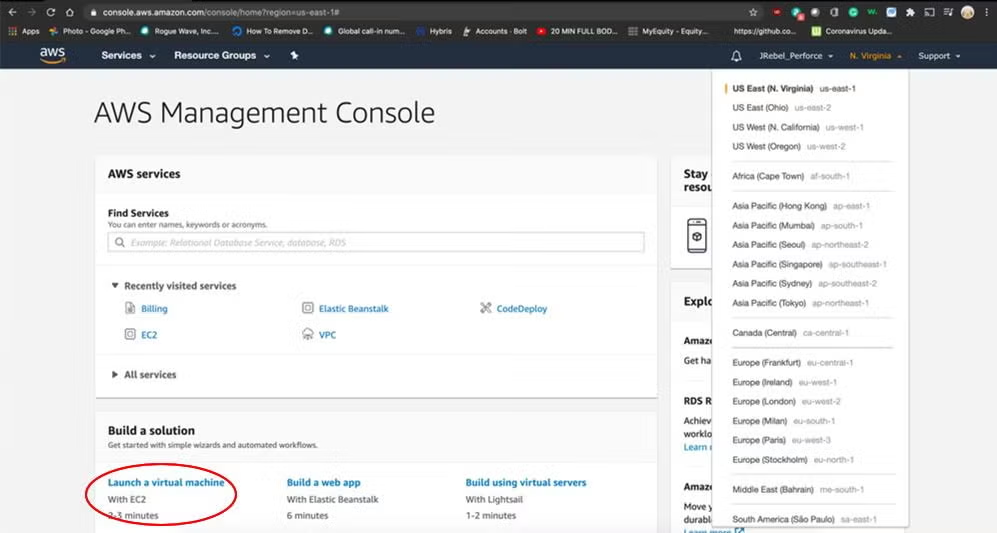
- First select the Launch a virtual machine with EC2. This instance will provide more flexibility to your environment than Beanstalk (hence why we are reviewing this process).
- Pick your target environment. For this example, I selected Amazon Linux AMI 2018.03.0 (HVM), SSD Volume Type because I am planning to deploy a Java application.
- Next select the instance type. I choose the t2.micro (Variable ECUs, 1 vCPUs, 2.5 GHz, Intel Xeon Family, 1 GiB memory, EBS only) mainly due to the fact that this is the only free tier eligible service.
- I recommend using all the defaults following the Instance Type selection unless your application instance requires more prerequisites. Select review and launch on the bottom right.
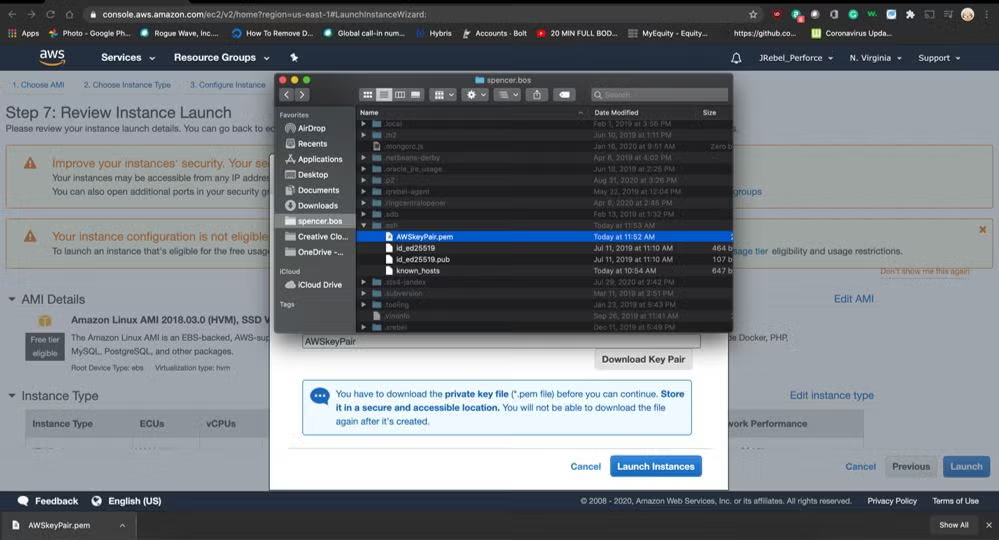
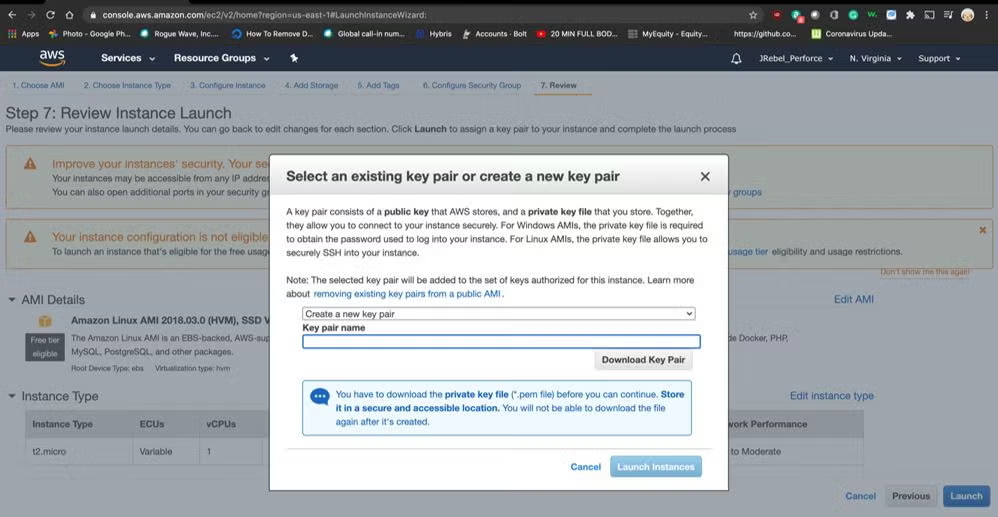
- Assuming that you don’t already have a Key Pair. Please select Create New Key Pair I suggest naming it something simple like “AWSkeyPair”.
- Download should start immediately after naming the Key Pair. Move the new AWSkeyPair.pem to safe place on your machine something like the .ssh folder.
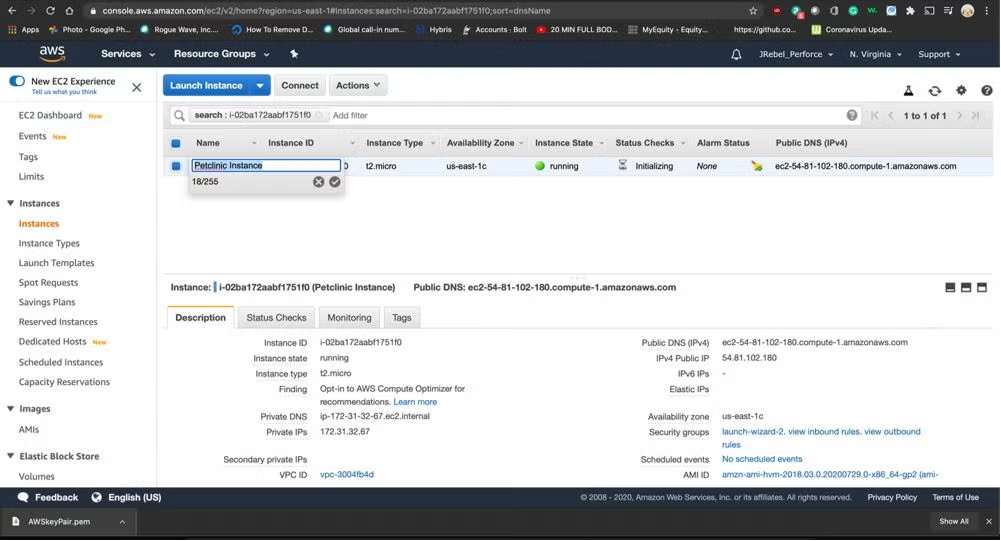
- Launch the new instance.
- Lastly, rename the instance to something like a project name or application. I named the instance to “Petclinic Instance”.
 Back to top
3. Connecting to the Instance and Configuring
1. Click on Connect on the top of the screen.
2. Next a new window will appear providing three options to connect.
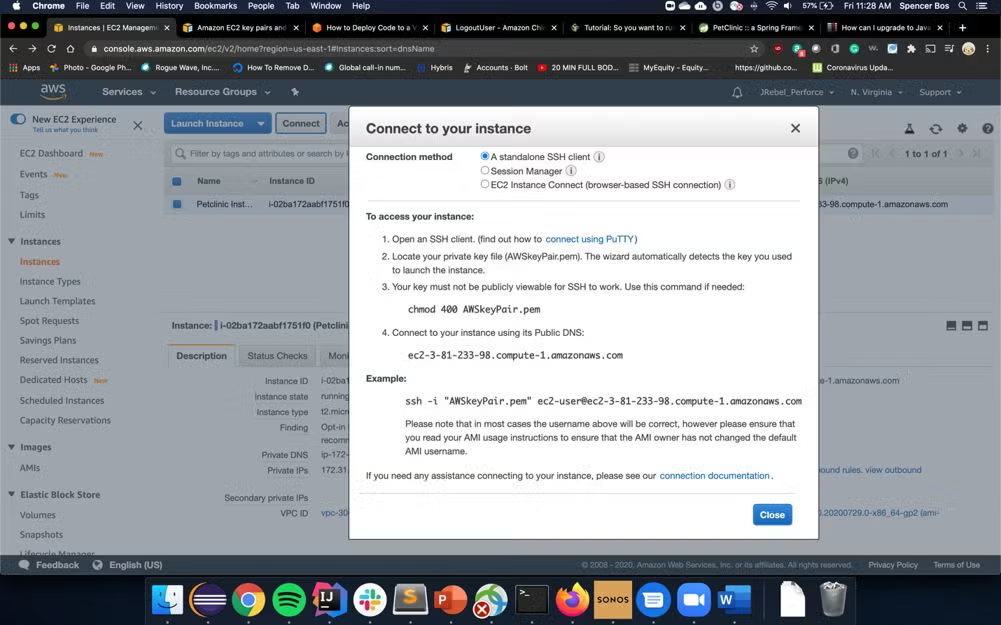
3. For best results and for this example I suggest using the A standalone SSH client.
a. Following the steps indicated in the window.
4. After following the above commands, you should see the following text.
% ssh -i "AWSkeyPair.pem" ec2-user@ec2-54-81-102-180.compute-amazonaws.com
The authenticity of host 'ec2-54-81-102-180.compute-1.amazonaws.com (54.81.102.180)' can't be established.
ECDSA key fingerprint is SHA256:Jk6BgjYJCtlak4pjmILPPZ1+FqMLMNIj/jdm0X5MoZk.
Are you sure you want to continue connecting (yes/no/[fingerprint])? yes
Warning: Permanently added 'ec2-54-81-102-180.compute-amazonaws.com,54.81.102.180' (ECDSA) to the list of known hosts.

       __|  __|_  )
       _|  (     /   Amazon Linux AMI
      ___|\___|___|

https://aws.amazon.com/amazon-linux-ami/2018.03-release-notes/
11 package(s) needed for security, out of 17 available
Run "sudo yum update" to apply all updates.
5. Because we are running a Java web application, test the Java version.
a. Run
java -version
b. If the Java version is out of date, please do the following.
sudo yum install java-1.X.X
sudo yum remove java-1.7.0-openjdk
3. Adding the Java Application and Application Server
1. For this project I am using:
a. https://github.com/spring-projects/spring-petclinic
b. https://archive.apache.org/dist/tomcat/tomcat-8/v8.5.5/bin/
2. To upload both the application and the server at the same time and save time add the petclinic.war to the webapps folder of the Tomcat Server.
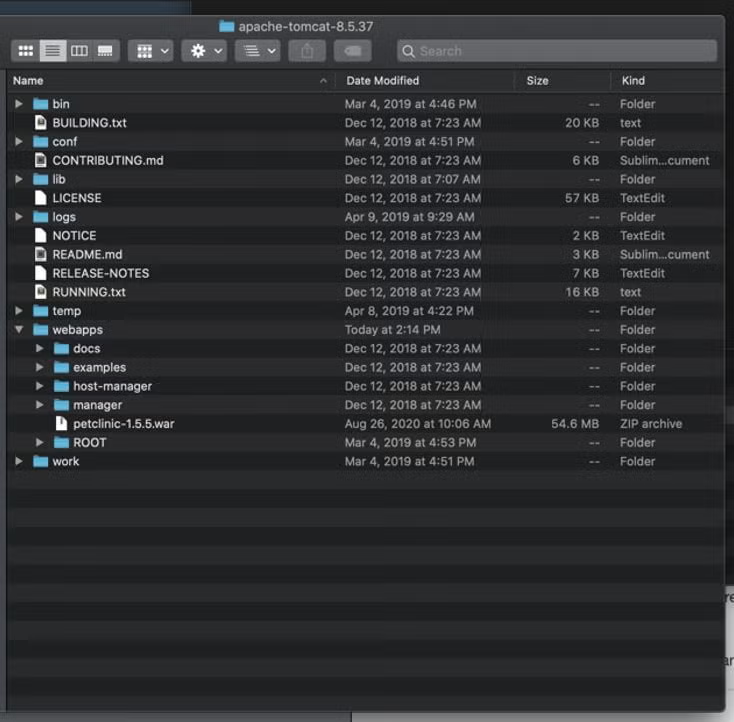
a. Compress the folder before uploading on the instance
3. Now run the following command to upload the entire apache-tomcat-8.5.37 package with the petclinic.war:
rsync -azv --progress -e "ssh -i AWSkeyPair.pem" /Users/path/to/apache-tomcat-8.5.37.zip ec2-user@ec2-54-81-102-180.compute-1.amazonaws.com:
a. After uploading the package, unzip the folder.
b. You need to replace “Users/path/to/apache-tomcat-8.5.37.zip” with the correct path.
4. Running the Petclinic application
1. Open the terminal window where you are connected to EC2 instance and go to the apache-tomcat-8.5.37/bin folder.
2. Run the following command:
./Catalina.sh run
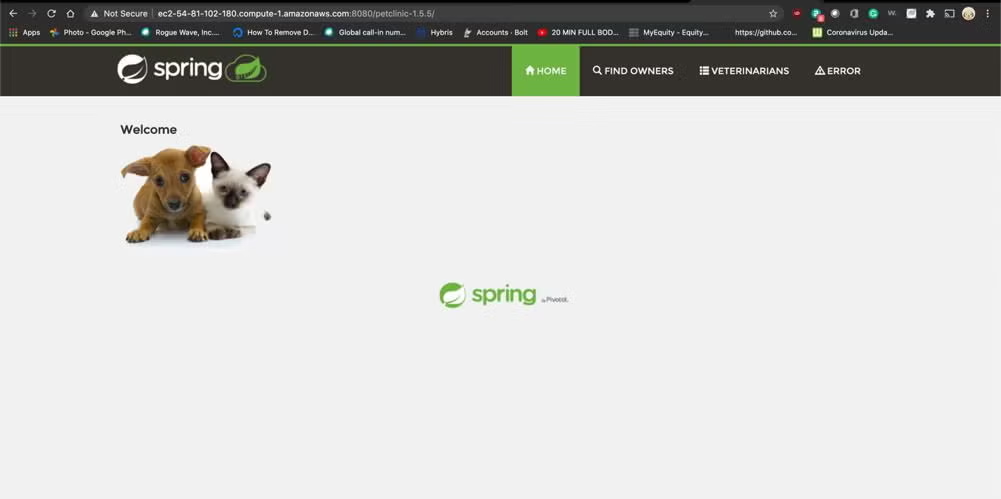
3. Voila! Now you are running a Java Web Application on a Tomcat using the Spring Petclinic project.
a. To test the project, go to the AWS Instance and copy the Public DNS(IPv4) value to your clipboard.
b. Paste that value in your web browser: ec2-3-81-233-98.compute-1.amazonaws.com:8080/petclinic
4. Now you should be able to see the application.
a. If you are unable to access the application, ensure that your instance security has ALL TCP on as well as port range set to max.
Back to topFinal Thoughts
The above steps are there to help you get started with deploying and testing an application on an EC2 instance without having to use Beanstalk or other products within the AWS brand.
Additional Resources
Looking for additional reading? Be sure to check out these resources.
- Blog - What Is Pivotal Cloud Foundry?
- Blog - Unit Testing Cloud Applications
- Blog - Best Java Cloud Frameworks
Redeploys Slowing You Down?
JRebel can help your team skip redeploys, and get back to developing. Want to see how it works with your application? Discover how much time your team could save during a 14-day free trial.