Eclipse
Eclipse
1. Installation
- Open Help > Eclipse Marketplace…
- Search for JRebel and XRebel. Found it? Press Install.
Did This Work?
- If the installation is successful, your IDE will automatically restart. After the restart, XRebel will display a notification confirming activation. You’ll also notice a new menu option available under Help > XRebel.
2. Startup
- XRebel for Eclipse is automatically enabled for all supported application servers.
Good to Know
To review startup configuration:
- Go to Run options under menu bar
- Select Run configuration
- Select your application from the left menu
- Click on JRebel & XRebel Tab bar and check "enable XRebel Agent" checkbox
Did this work?
When successful, you will see the XRebel banner in the console right at server startup. This is what the XRebel banner should look like:
4. XRebel: ################################################################
5. XRebel:
6. XRebel:  XRebel Agent 2025.2.1 ()
XRebel:  (c) Copyright 2007-2025 Perforce Software, Inc.
XRebel:
XRebel:  For questions and support, contact support-rebel@perforce.com
XRebel:
XRebel: ################################################################
3. Activation
JRebel and XRebel now share a single 14-day trial.
- Start your trial from the JRebel IDE plugin or trial signup form.
- If you have a JRebel license though licenses.zeroturnaround.com, ask your account administrator to turn on the XRebel trial.
- If you have any questions or issues please contact support-rebel@perforce.com
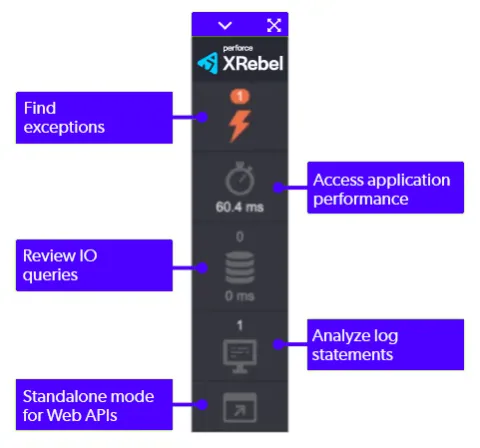
4. XRebel Experience
- Click around in your application.
- Keep an eye on the XRebel toolbar in the lower left corner.
- Press the toolbar buttons to open the relevant views:
Image