Standalone
Standalone
1. Download
Download XRebel
- Start your trial from XRebel IDE Plugin or the trial signup form.
- If you have a JRebel license through licenses.zeroturnaround.com, ask your account administrator to turn on the XRebel trial.
- If you have any questions or issues please contact support-rebel@perforce.com .
2. Startup
- Add XRebel to your server startup parameters:
-javaagent:[/path/to/]xrebel.jar - Start your server!
Good to Know
- Don’t know how to configure your server parameters? Follow these instructions.
- Want to know whether XRebel supports your browser, server or database? Check out all supported environments.
Did this work?
When the XRebel launch is successful, you will see the XRebel toolbar pop up in the bottom left corner of your webapp. A console banner is also shown for a successful launch:
XRebel: ################################################################
XRebel:
XRebel:  XRebel Agent 2020.3.1 (202009181141)
XRebel:  (c) Copyright 2007-2020 Perforce Software, Inc.
XRebel:
XRebel:  For questions and support, contact support@xrebel.com
XRebel:
XRebel: ################################################################
3. Activation
- The activation dialog pops up automatically following XRebel launch.
- Fill out the form.
- Press Activate XRebel Trial.
I Have a License
- Already have an XRebel license? Press I have a license to activate using an existing license.
- Activation key. Paste your activation key if you have one already.
- License file (xrebel.lic). Point to your license file. This file was included in the zip file that was downloaded upon completing the trial request form.
- License server. Enter your Group URL and email. You get the Group URL from your network administrator.
4. XRebel Experience
- Click around in your application.
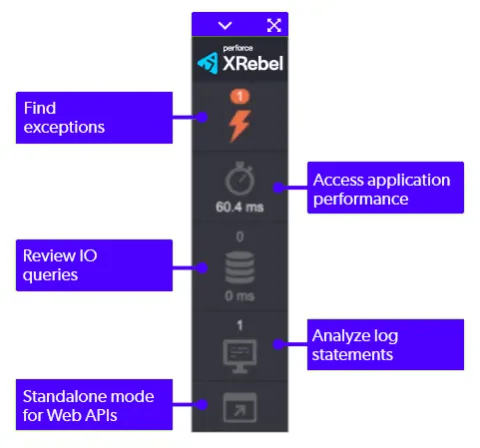
- Keep an eye on the XRebel toolbar in the lower left corner.
- Press the toolbar buttons to open the relevant views:
Image